
WET DRYWALL AFTER A FLOOD?
Professional Guidelines on Drywall Care after Flood Damage
Knowing how to access property damages after a flood requires special knowledge that often homeowners are not well versed in. For instance, should you be removing wet drywall after a flood? Ask this of a handyman, electrician or close friend and you will get 3 different answers. There is however, an objective standard that has been created by the IICRC (Institute for Inspection, Cleaning, Restoration Certification) that has produced the S-500 publication answering this very question. Created by experts in various fields such as property restoration, microbiology and construction, there is no reason to guess what to do with wet drywall any longer.
Once water has reached walls and ceilings comprised of drywall there are several questions one needs to get a clear answer on, as this will guide the necessary steps going forward. Under some conditions, drywall must unequivocally be removed to eliminate the possibility of mold growth and mold spore spread throughout the home. In other scenarios the wet drywall can be safety restored leaving no evidences it was ever wet to begin with. Knowledge is key and willingness to follow the same standards that professional restoration companies must follow, will allow you to breath easier.
3 Types of Water That Make Drywall Wet
Before removing wet drywall or considering the proposition of restoring drywall, we need to turn our attention on the 3 types of water that gain access to drywall, either in a flooded basement or main floor.
- Type 1. Fresh water that comes from municipal plumbing lines. This is water from a broken pipe, burst water heater or malfunctioning appliance.
- Type 2. Water that has living organisms capable of amplifying and fueling the rapid growth of mold. This water originates from sump pump wells, also known as ground water and from foundation leaks.
- Type 3. Water that originates from highly unsanitary environments with potentially pathogenic (causing illness) germs. Sewage backups, water from lakes and streams and toilet overflows all are considered type 3 water. This type of water destroys everything it comes in contact with and requires sewer backup restoration of the entire area affected.
Knowing the 3 types of water and their identity, allows us to cut to the chase on removing wet drywall after flood cleanup. If type 3 water is known to have come into access with drywall the answer is always removal, and sooner the better. The materials are contaminated beyond the possibility of safety drying and will always off gas mycotoxins. These along with up to 81 harmful viruses seems to make removing wet drywall during flood cleanup a no-brainer.
“No you can’t disinfect, seal or cover the dangers, removal is the only safe option”.
How Long Drywall is Wet Matters
OK! so now we know all wet drywall from type 3 water requires removal. So lets identify another factor that will guide whether wet drywall from type 1 and 2 water can be restored or removed, TIME! Time makes the contamination level of the drywall moving towards a worse condition each hour finally producing the same dangers as type 3 water.
Once type 1 water absorbs into drywall, it becomes type 2 in 72 hours. That is the standard to apply to any type of wet drywall state. Every 72 hours or 3 days the water type automatically transitions to the next type. This being said, if fresh water is in drywall for 72 hours it is in a state of potential restoration. If wet for 144 hours or 6 days, removal is recommended.
How to Remove Wet Drywall
Fortunately this step does not require the instincts of a Neanderthal and large blunt instruments being directed aimlessly at materials. While it might be enticing to participate in theatrical demolition as seen in one of those home improvement shows, your trying out for a Hollywood production. Removing wet drywall during a flood is a bit more civilized.
How Much Drywall to Remove?
It is important to know how high the water has absorbed into the drywall as this will determine at what height materials are to be removed. This can be done with a moisture detection device available from most local hardware stores. Typically drywall is removed 24″ up making it easier for repairs. No dry wall repair specialist wants to work any lower as it is difficult on the body. If it is determined drywall is wet over 24″ up, measure to the next foot or 3′ up.
TOOLS YOU WILL NEED
- Eye googles
- Construction mask
- Gloves
- Utility Knife
- Tape measure
- Chalk line
- Crowbar
- Permanent marker
Step 1. Use the utility knife to carefully score the caulk line between base molding and dry wall. This should be rather easy due to the drywall being wet.
Step 2. Use crowbar to remove the base molding from wall. Don’t worry about beating up the drywall as it is being discarded anyway. Be careful to watch for sharp nails when pulling the base as they are regularly used during base installation.
Step 3. Using the tape measure place a mark at the designated height drywall is to be cut up to. Placing the mark on the furthest left and right of the damaged wall is best.
Step 4. Using the chalk line hook at the end, drive it into the height of the first mark. Stretch line to the mark at the other end and pulling it somewhat taunt, snap the line to introduce a clean line on the drywall for cutting.
Step 5. Using the utility knife follow the line by cutting into the drywall at a minimal depth as this is the scoring cut. Once completed follow the score cut with several deeper cuts till drywall backing has been reached.
Step 6. Using the crowbar, drive it through the cut line and manipulate back and forth and begin to remove drywall. Often drywall will come out easily in big sections, other times it will break into many sections and make a mess.
Step 7. This step is only for walls with insulation. Once all wet drywall is removed the inner cavity will either be hollow or filled with insulation. It is easy to recognize wet insulation if it has a paper backing on one side. If there is no paper backing and yet your not certain the insulation is wet, remove it. Determining moisture in insulation can be difficult to identify without expensive moisture detection meters. It is better to error on the side of precaution and remove it, than to leave behind a moisture source for mold to find.
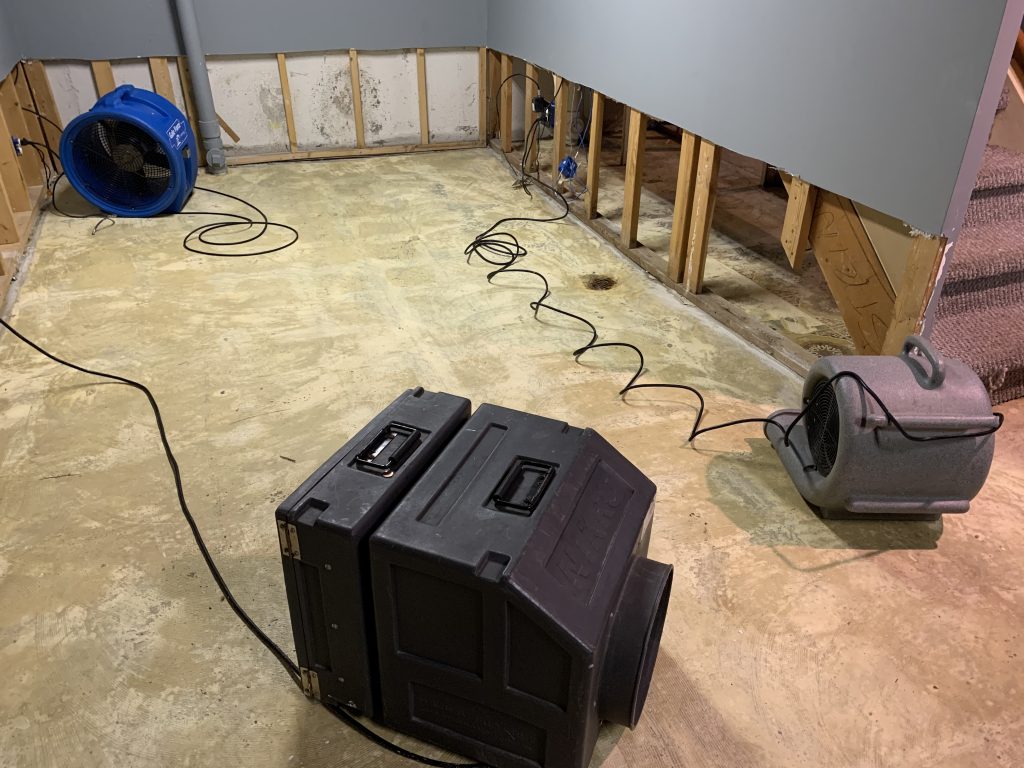
Step 8. If drywall was wet requiring removal the wood substrates are definitely wet too, needing to be dried. The bottom plate along with any wet 2×4 studs will require additional air movement to remove moisture from the wood. Place a fan or several (depending on area size) in a way where forced air is passing across the wet structure and leave running 3 days.
Wet Drywall Removal Prevents Mold Growth
The chief responsibility in flood damage cleanup is to eliminate the potential for mold to grow and develop. This is why wet drywall that falls into any of the previously mentioned categories is removed, to preserve the purity of indoor air in a property. Additionally removing wet drywall eliminates the chance for future mold growth, if there was any incipient (just beginning to grow) mold that was naked to the eye.
Drywall is a cellulose material which is recognized as a favored food source for mold growth and its spread. The type of mold found after flooding on drywall is often the feared black mold (Stachybotrys chartarum) and avoiding this is of critical importance. Black mold on drywall is difficult to remediate without spreading mold spores everywhere and is highly expensive to fully eliminate. By removing wet drywall during flood cleanup you are sparing yourself the potentially devastating repercussions of a mold flare-up, that can threaten both human health and your bankroll.
How to Dry and Restore Wet Drywall
Wet drywall that falls into the salvageable criteria described above is wet no longer than 3 days of type 2 water and no longer than 144 hours of type 1. Restoring walls and ceilings comprised of drywall is recognized as safe and is also an industry standard the IICRC approves of. While there may exist a bit of interpretational minutiae, such minor details are not the purpose of this article.
Air movement and dehumidification are always necessary when attempting to dry wet drywall after flood damage. Here are 4 recommended steps to follow for the best results.
1. REMOVE ANY BASE MOLDING: This will expose the wet drywall at its lowest level and remove the envelope like seal between the back of the base molding and front paper skin of the drywall. Trapped moisture in this hidden environment will always produce mold growth first. The ideal conditions of stagnant air, rich moisture content and absence of UV light, make for the perfect storm opportunity for mold.
2. PLACE 1″ HOLES AT THE BASE OF WET DRYWALL: This will allow for a scientific principle known as equilibrium or homeostasis. Simply put the holes act as open vents to allow for the release of trapped moisture in the wall cavity. Place each hole high enough to get over the top of the 2×4 bottom plate, but not higher than the top of the removed base moldings highest point. This way after drying is complete, the re-installation of base will easily cover the holes.
In walls that are known to not have in interior hidden cavity, no holes are required. For instance, walls that allow you to have access from behind because they are not finished on both sides.
3. INSPECT FOR WET INSULATION: Place your finger in one of the drilled holes at the base of the wall and feel for insulation. If insulation is present and wet, this project has taken a turn for the worse and you may want to consider getting professional help for water damage. A careful damage assessment of the drywall is required, a non-penetrating moisture meter is needed and removal of the drywall to access and remove insulation may be necessary. If you are a committed do-it-yourselfer, follow steps 3-8 above.
4. SET UP AIR MOVERS: Aim air movers or fans on the wall at a 45° angle every 10 feet for 3 days, which is the industry standard for drying wet drywall. Ideally you want the placement of a dehumidifier as well if the area attempting to be dried is over 15′ in length.
That’s all there is to restoring wet drywall after flood damage. If the base moldings were pine and have dried having no suspicious blemishes and they have not warped, they can be re-installed. If there is a question as to their usefulness, install new base moldings, which are often sold as a discounted contractor bundle at most supply warehouses.
Should you Contact Professionals for Flood Cleanup
If any of this seems to be a heavy lift and like reversing the flow of the Niagara, call the water damage restoration professionals at Action Extraction. We offer free property damage assessments using scientific instruments that will identify any problems and allow for the correct protocol for wet drywall. If it is deemed, removing wet drywall during flood cleanup is necessary, you will know from the experts. If the drywall can be restored safety, this too will be from skilled tradesman with over 30 years of experience. If for any reason you choose to hire us for water restoration services, we will document all work and assist in an insurance claim. We offer a 100% customer satisfaction guarantee on all work and stand by each completed project with pride in our work.
♦ CHECK OUT OUR ARTICLE ON: Should water damaged paneling be restored or replaced?